August 2025 / Update November 2025
Introduction
Setting up the upload
In the first step, the administrator or modeler must create an Upload Job under the Data Management Tab. There you need to upload a template file (.csv/.xlsx and .txt are supported) where the modeler can create necessary transformations. As a last step, the columns from the template file need to be mapped to model dimensions and measures. You finalize the creation of an upload job by defining the Import Method (Update or Append) and the Reverse Sign by Account Type (Off or On) in the job settings:

Figure 1: Job settings for import job
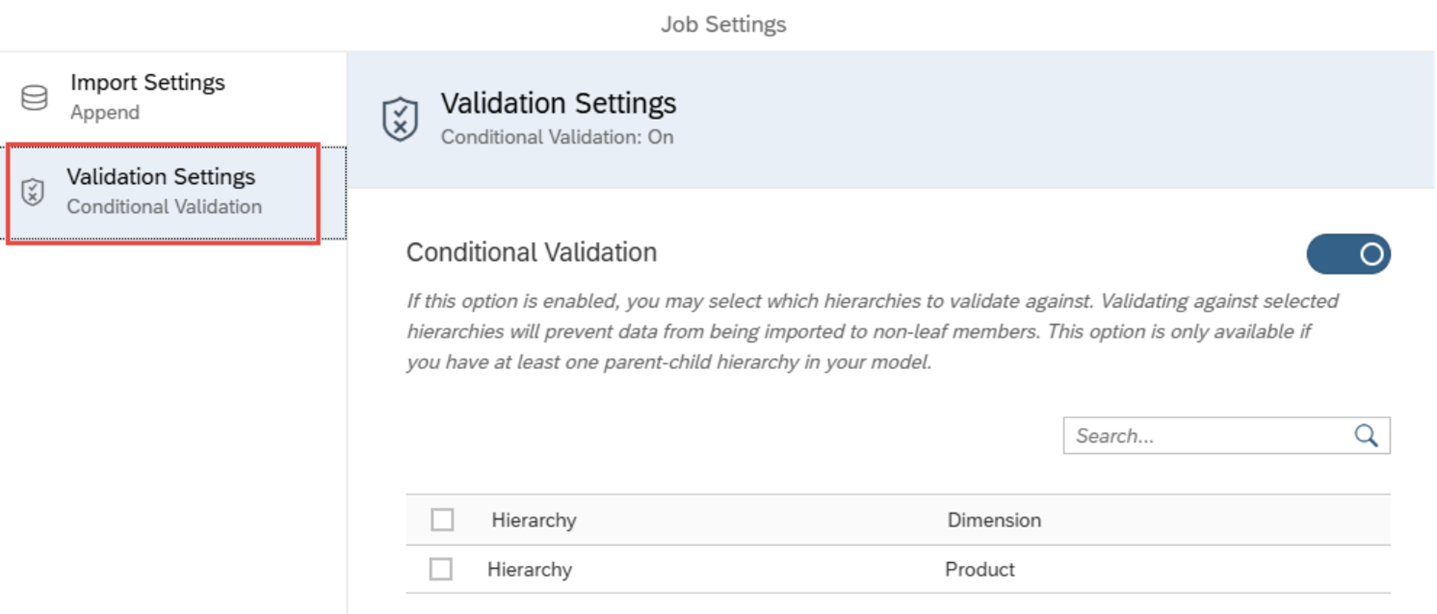
Since release Q3/2025 you can set up if and from which hierarchy the system should make sure only leaf members are updated during the upload.

Figure 2: Job setting for import job - validation settings
In the Data Management view you find in the timeline each upload executed later by the planner with the option to download again the error report for the rejected rows.

Figure 3: New option for upload jobs definition in the data management tab with the protocol of uploads in the timeline
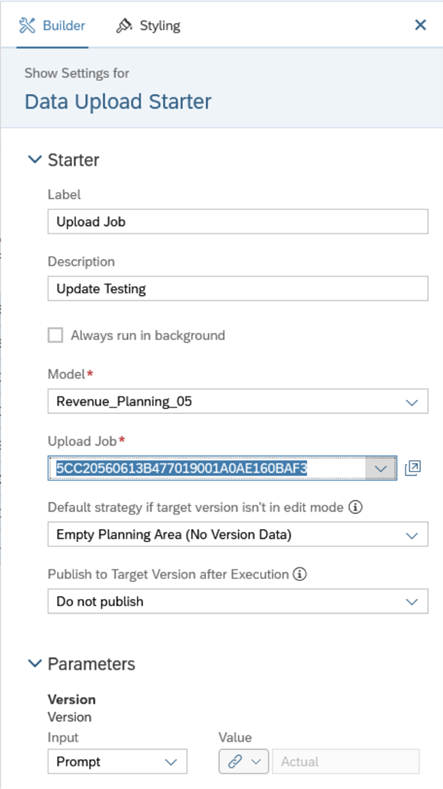
Once the Upload Job is created, the story designer needs to add the Upload Job Button to the Story. The button functions much like a data action widget, offering consistent user experience. When configuring the story, designers specify the model, choose the upload job that was created earlier, and apply default settings such as the target version or whether the data should be published automatically. These configurations can be either fixed or exposed as prompts, allowing end users some control during the upload process. If you use planning areas for big data volume you can finetune handling during the upload process. Once everything is set up, the story is ready to be used for uploads.

Figure 4: Settings within data upload starter
Upload Process


Script options
For the data upload job, users can leverage scripting through onBeforeExecute and onAfterExecute hooks. The onBeforeExecute script is triggered before the upload popup is shown, while the onAfterExecute script runs after the upload job is completed.
As a designer, it's important to note that these scripts are executed even if the upload was canceled by the user, was only partially successful or completely failed. To ensure that a data action is executed only after a successful upload, the following line of code can be used within the onAfterExecute script (or on the other status Warning, Error respectively):
|
if (status === DataUploadExecutionResponseStatus.Success ) { …; } |
This status is not known in the script onBeforeExecute! Pay attention to revert changes done in the onBeforeExecute if the user canceled the upload or warnings were issued with lines rejected.
Unfortunately, the rejection information is not accessible within the script.
Recent improvements - Release Q3/2025
Better error handling
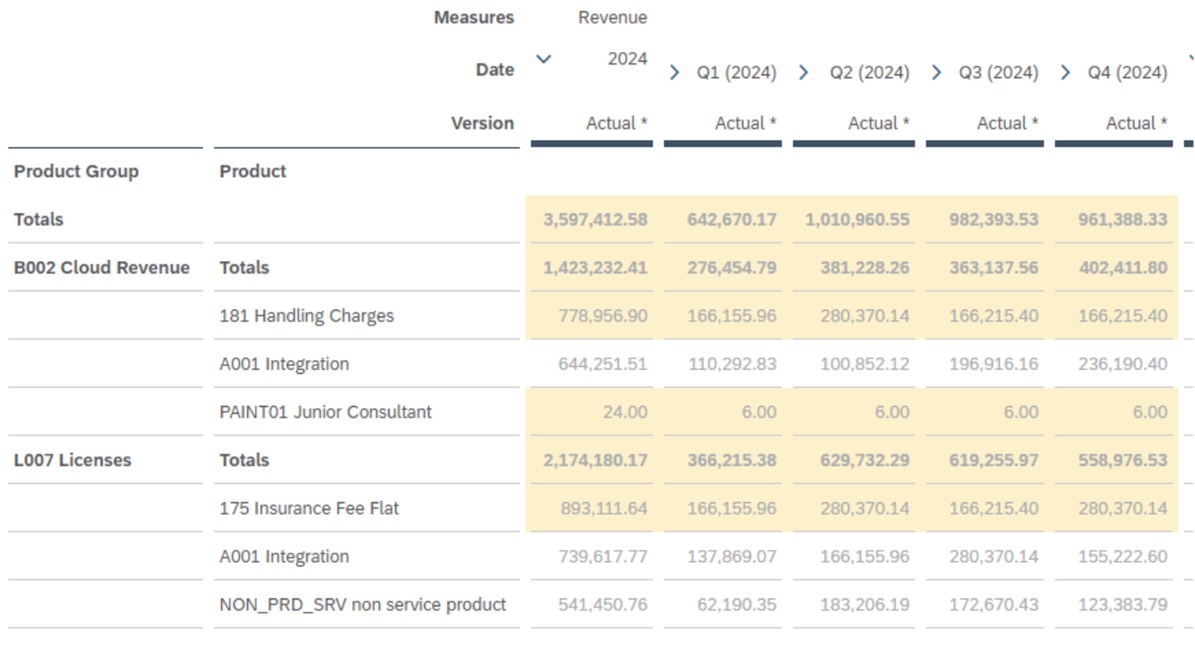
Error handling is cumbersome, possibility to edit wrong lines in a popup would be nice: Popup-Fenster korrigieren zu können:
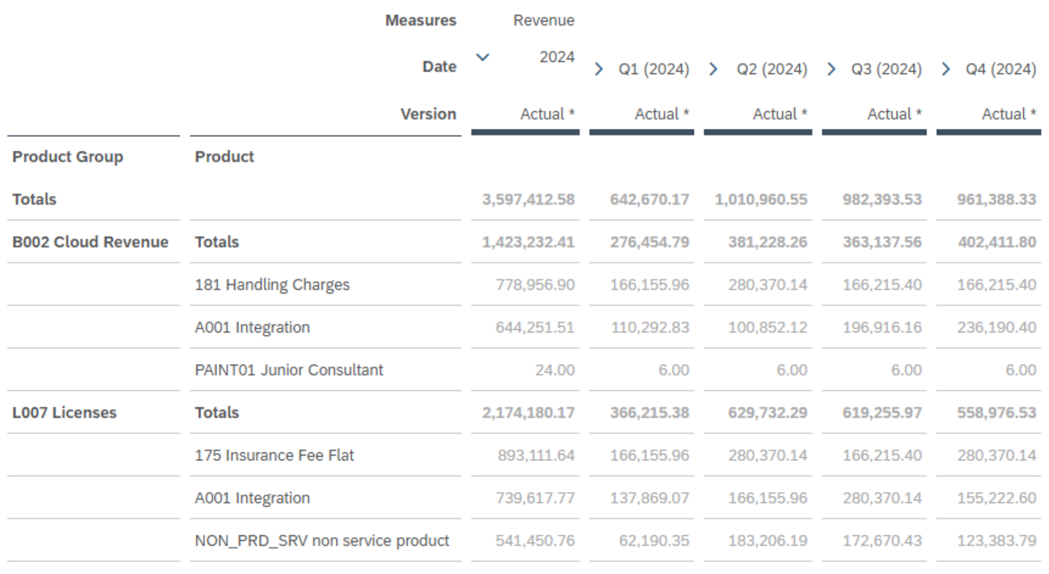
Example file structure
No master data upload
Only fix columns possible in the file
Deleting data during update upload
Better handling of deleting data missing in the upload file during update as already mentioned:
Data Upload Starter Clean/Replace and Clean/Replace Subset not available
This is planned for Q4/2025:
Plan Entry: clean and replace for data file upload
Update Nov. 2025: This functionality was implemented as announced (details see above)!!


